Behind the Scenes: The Process of a Wedding Photographer
From first inquiry to final albums, gallery delivery, or print sales, every wedding photographer does things a bit differently. If you’ve ever wondered what goes on behind the scenes between booking your photographer and getting your delivered photos after your wedding, keep reading! Below, I’ve laid out my process broken down into steps from start to finish.
1) Introduction to Couple & Booking
Whether I am asked to document a proposal, referred to from a friend, vendor, or previous client, or discovered on Instagram, couples have found me in all sorts of ways. After our initial correspondence (typically a fairly brief email or message on social media), I request that we make a time to talk in person, via phone or Zoom to go over the client’s wishes and get a better feel for each other before booking to make sure that we are a great fit. I’m generally very easy to get along with but every now and then, budgets, personalities, or visions don’t align and it’s MUCH better to know that before a contract is signed!
2) Engagement Session
Not every couple chooses to book an engagement session, but this is by far the most common way that I meet couples before their big day. I always recommend an engagement session to couples (see why in my Instagram post on the subject!) to help them get comfortable in front of the camera and working with me among other reasons. It’s always a much more relaxed environment where the couple and I can really talk and get to know each other a bit before the (amazing) chaos of a wedding day.
TIP: If you’re looking to use photos from your engagement session on your Save the Dates, leave time for your photographer to edit the photos and for the save the dates to be printed. Plan to book your engagement session at least 8-9 months prior to your wedding! Save the Dates should go out between 6-8 months prior to your wedding day.
Also, see my helpful blog post on what to wear to your portrait session if you’re planning an engagement session!

3) Final Check-In Before Wedding
Around 2-3 weeks prior to the wedding day, I like to check in with my couples to do a final meeting to go over the day’s schedule and anything new that may have changed since we last spoke. At this time, I also will ask for a vendor list so that I can reach out to all of their vendors to introduce myself beforehand. Developing and fostering relationships with fellow wedding vendors is so important, and a quick note of introduction saying that I’m excited to work with them goes a long way. Also, sending out the gallery for their use showcasing their work on the wedding day (gorgeous floral photos for the florist, a beauty shot of the wedding cake for the bakery, wide shots of the venue in use for the venue etc.) is always appreciated.
4) Wedding Day!
The morning of the wedding, I start off with a healthy breakfast and get some caffeine in my system. I fill my fanny pack (I use this one) with some granola bars and fill up a big bottle of water (staying hydrated throughout the day is a STRUGGLE but so important for my energy levels and overall well being). Next, I pack up my camera bag and my harness that saves my back on long wedding days (I use this one). The night before, I will have made sure all batteries are fully charged and will have packed extra batteries, memory cards, & business cards in my fanny pack. I get dressed in something comfy but wedding appropriate (almost always a black jumpsuit and black sneakers like these). The worst mistake ever is wearing uncomfortable, non-supportive shoes for a wedding day. I’m on my feet for 6-10 hours straight and if I’m distracted by how much pain I’m in, I’m not going to be performing at my best. Once I’m all dressed and packed, I hit the road.
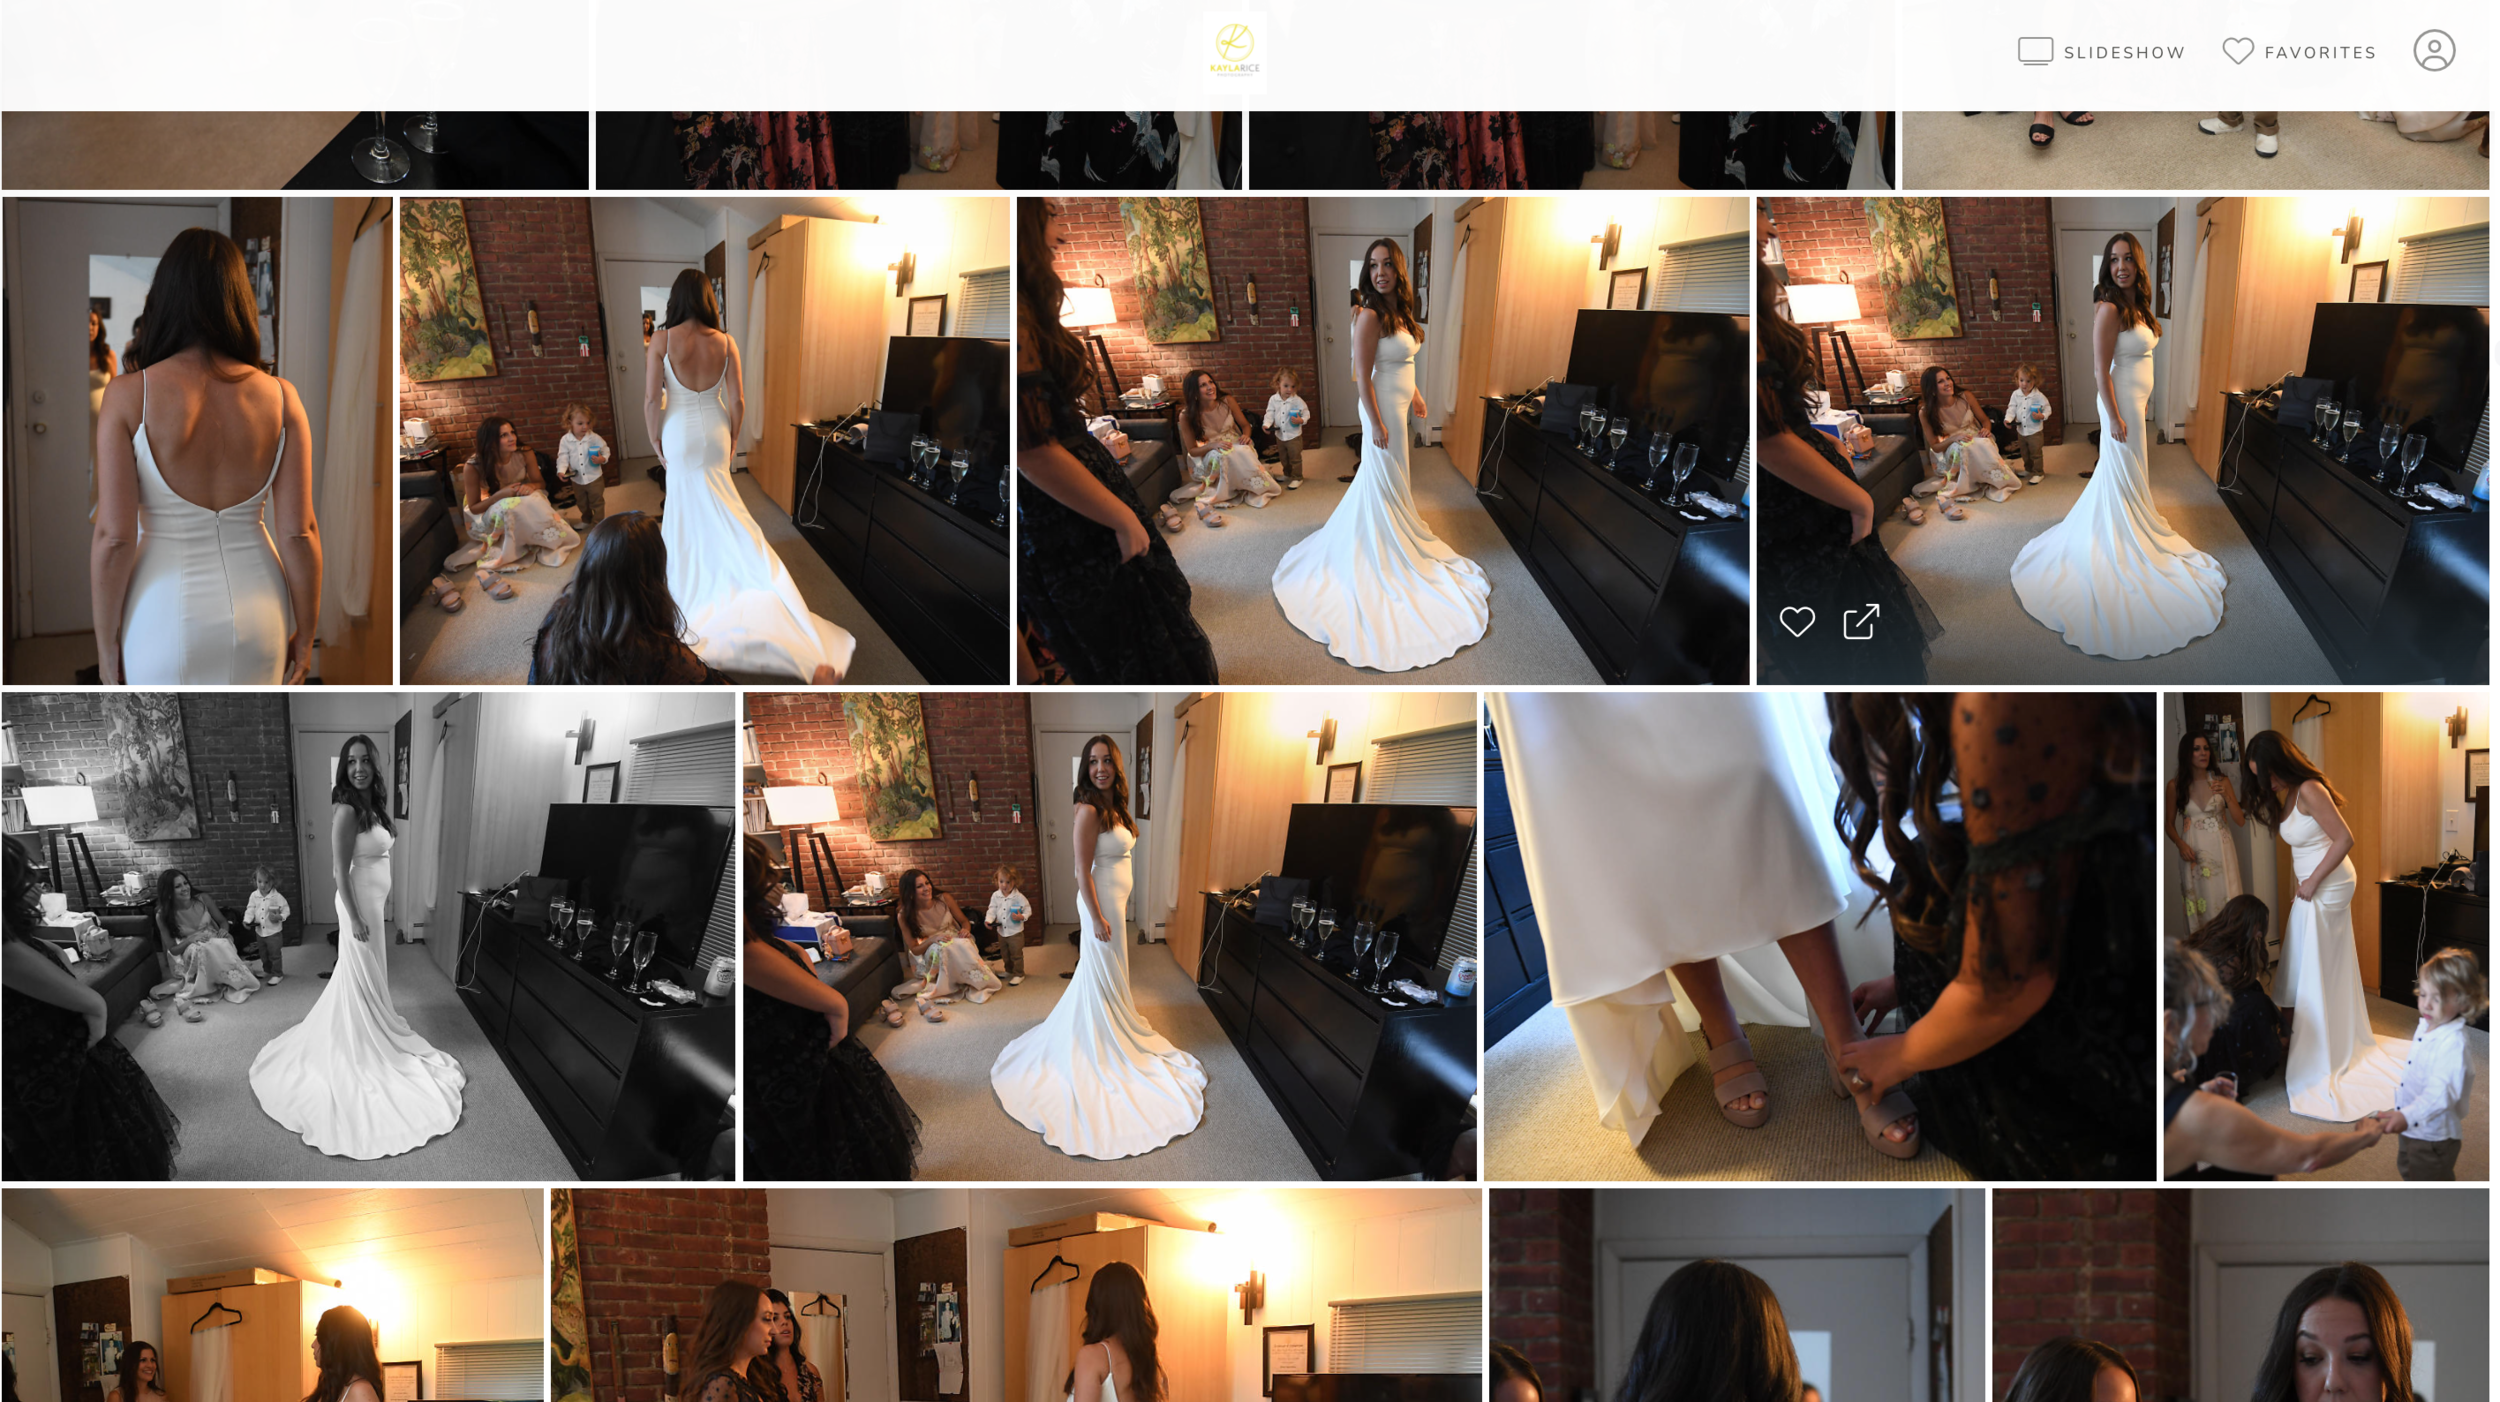
I’ll send the bride, groom, planner, and/or any other contact given to me a text when I arrive and will typically head to the bridal suite first to get some getting ready photos. If I’m photographing the wedding solo, I will usually stop by wherever the groom and groomsmen are getting ready and spend some time documenting their morning before moving on to the bride and bridesmaids.
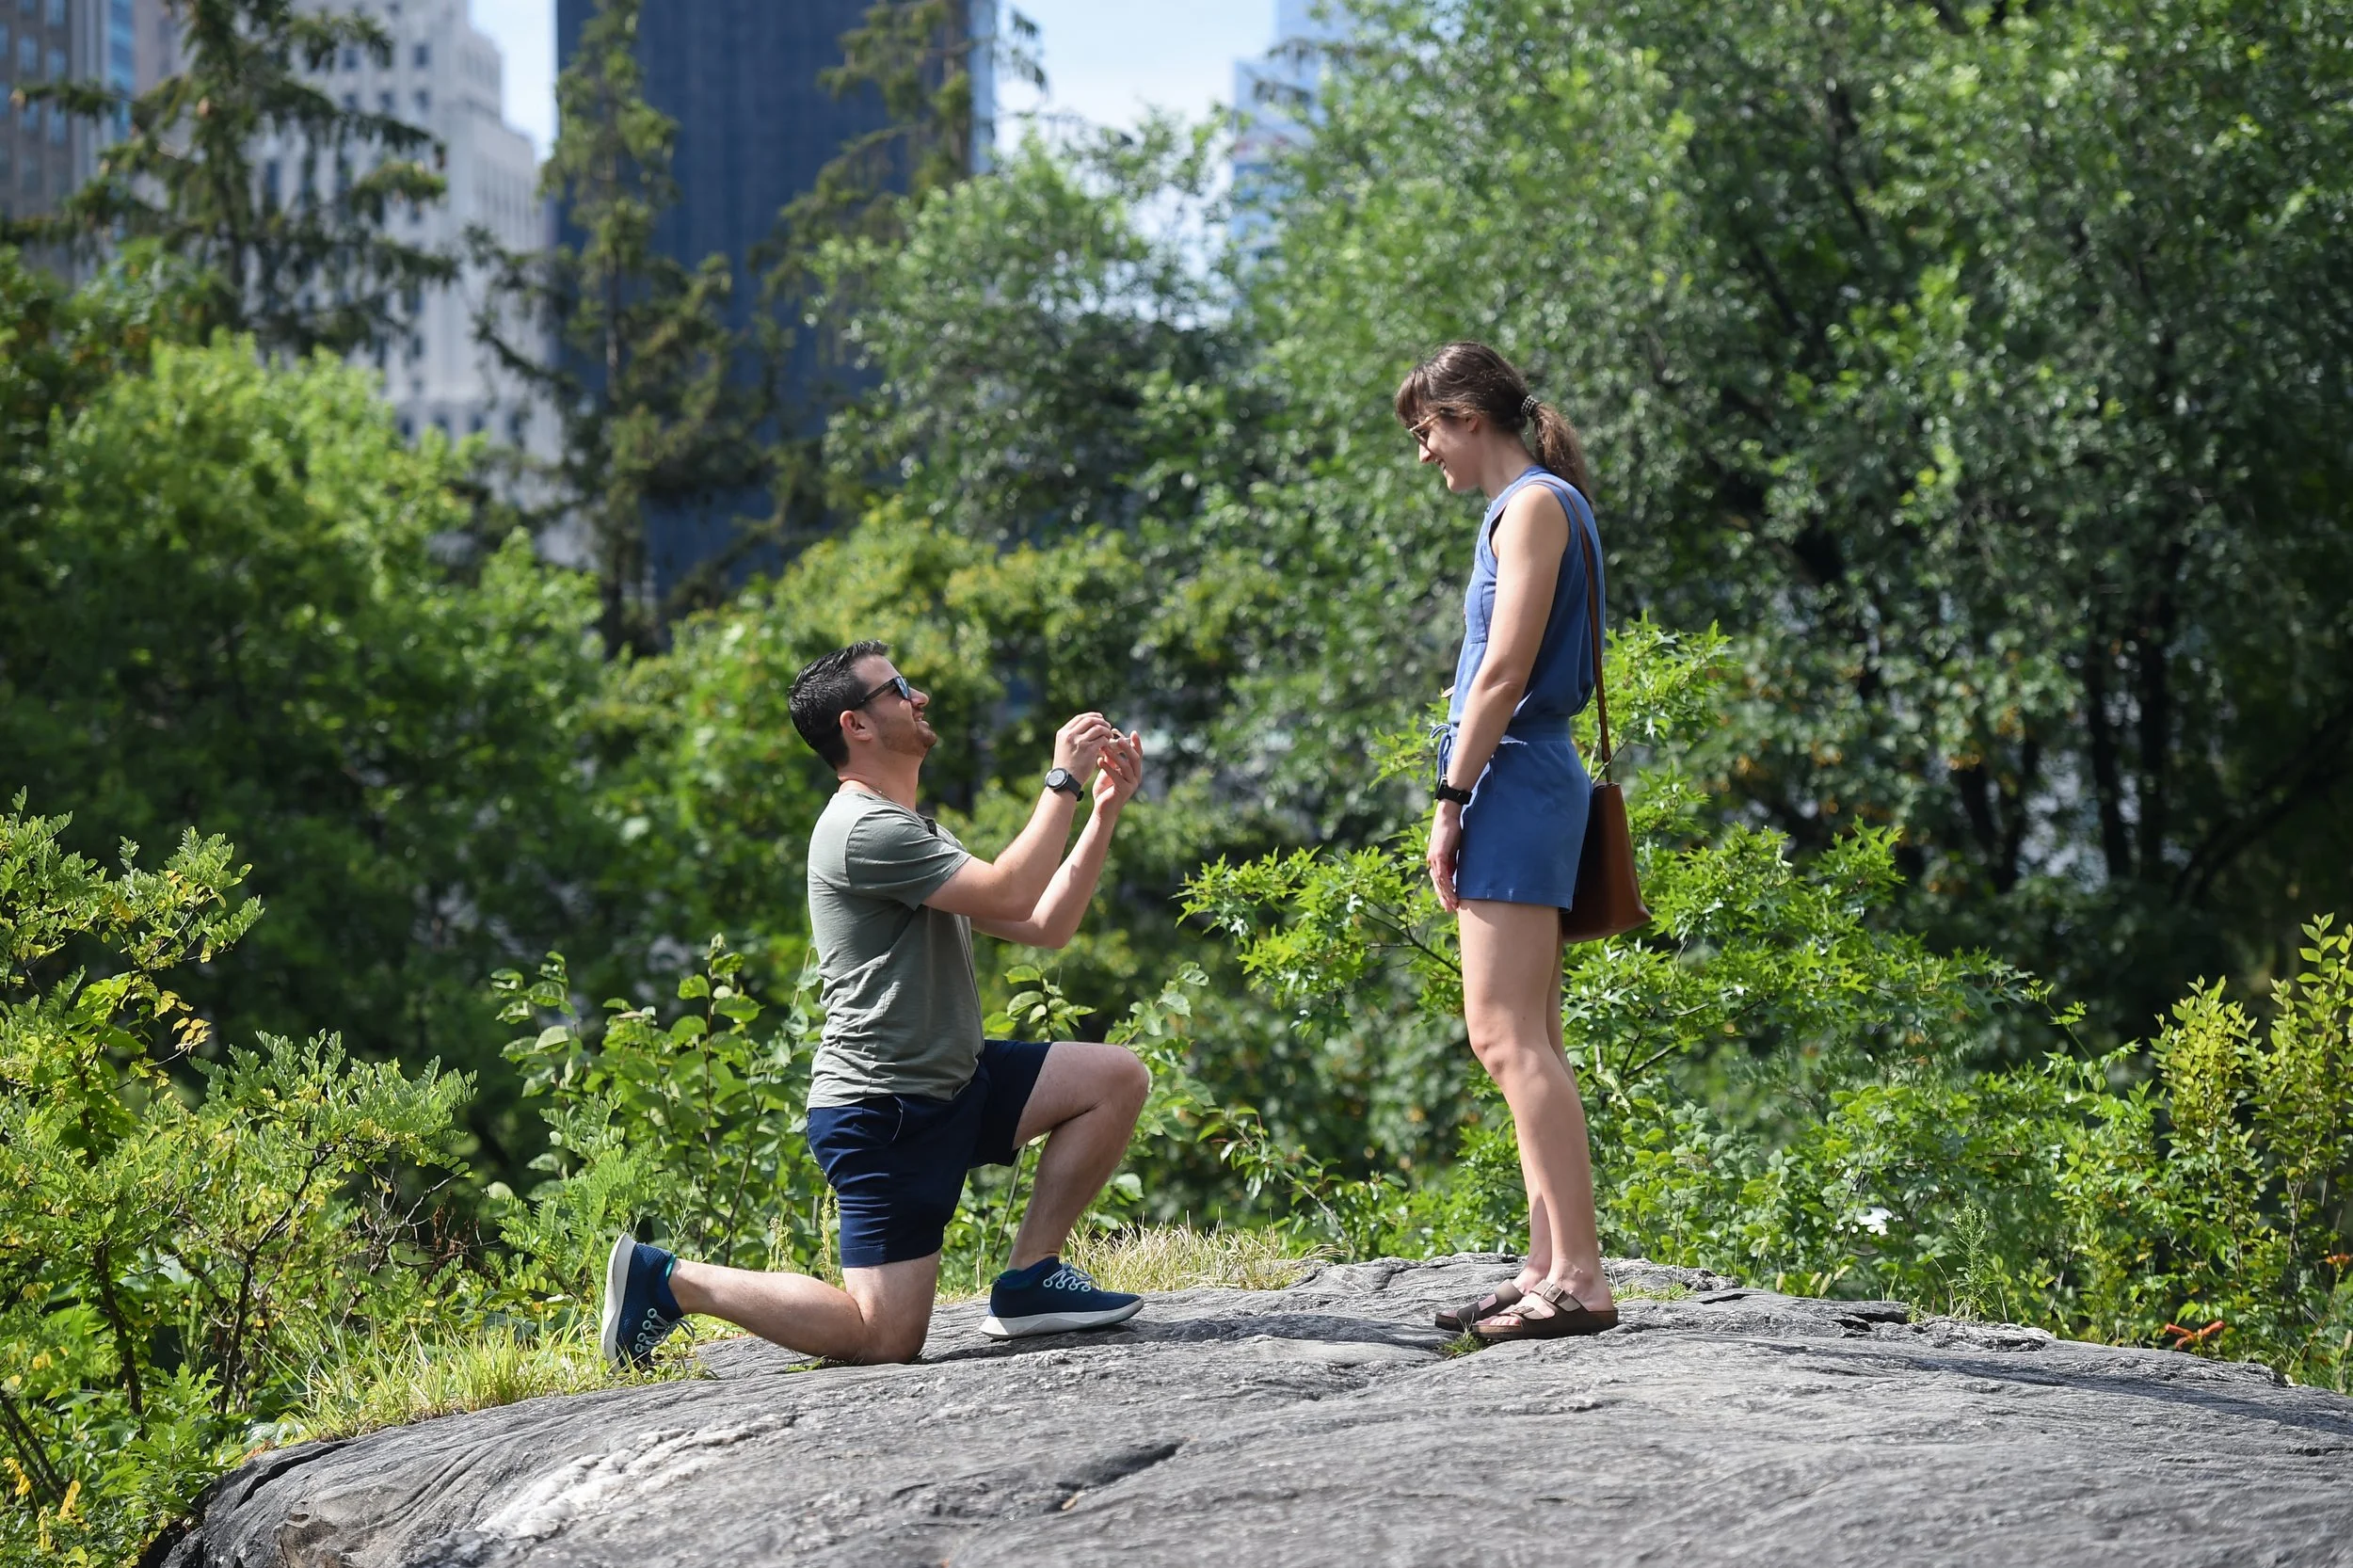
If the couple wants to do a first look, this will take place about one and a half to two hours before the ceremony and will be followed by couple portraits, family photos, & bridal party photos. After these portraits, I will head over to the ceremony location to document the scene there and prepare for the start of the ceremony.
After the ceremony, I will spend the remainder of the day documenting moments from the sidelines - capturing friends and family at the cocktail hour and dinner, first speeches, dances, and important moments during the reception. I always like to stay for at least a bit of dance floor time since that is when the celebration really gets going and many of the guests will have had a few drinks leading to some fun photos with lots of personality.
When my time is up, I’ll say a quick goodbye to the couple (making sure that there aren’t any last minute photos they would like before I leave) and then I’ll pack up my things and head home.

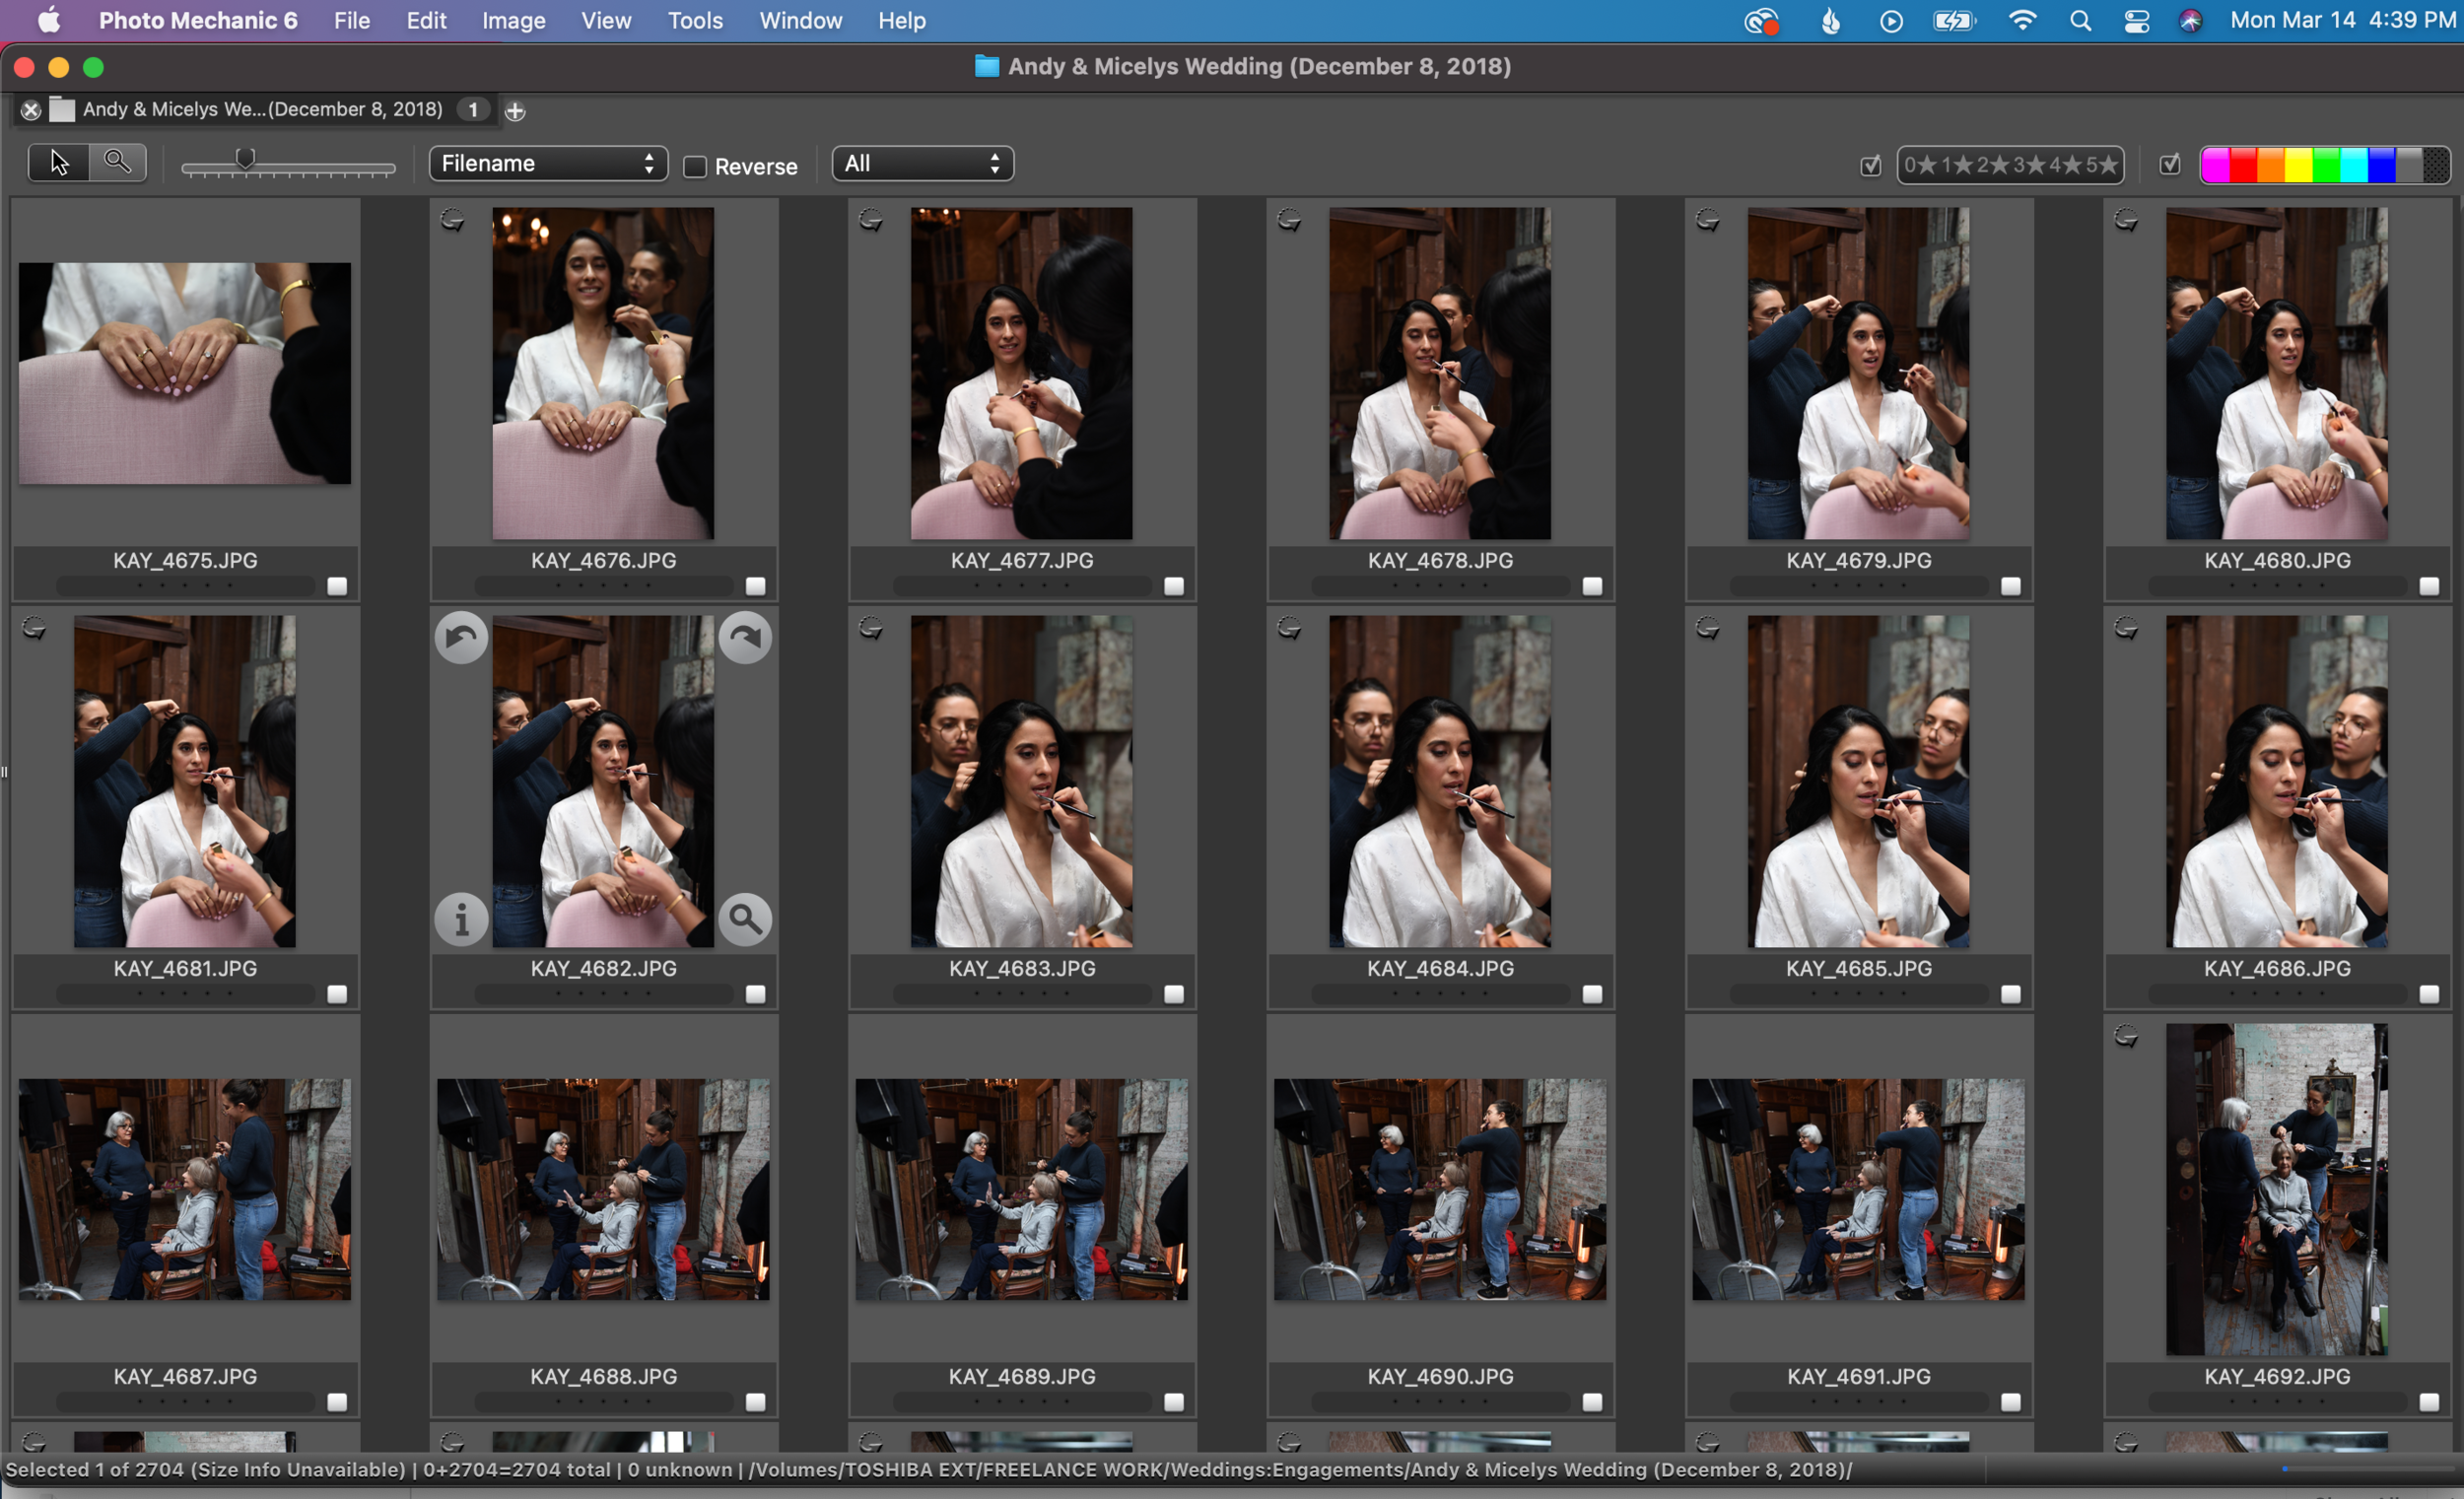
5) Uploading & Backup (IMMEDIATELY).
This is the most important step (after photographing the day itself I suppose). If I don’t back up throughout the day on site, I will make sure to do it as soon as I get home before I go to bed. I don’t take risks with the weddings I photograph. I know how important and special these images are to my couples and also how vital it is for my own reputation as a wedding photographer to be extra cautious. I always photograph with two memory cards in each camera (one acting as a backup) and upload my images to my desktop & multiple hard drives (both physical and cloud) as soon as I get home. Because of these failsafes, my couples and I don’t have to worry about my images getting lost or the potential of corrupt technology ruining a couple’s once in a lifetime memories.

Initial Quick Edit
The day after the wedding, if I have time (or if not sometime in the first week), I will take a quick look through the images and select 3-5 for a preview for the couple and a potential preview for my social media that week. I will edit these images the same way that I edit every image that goes out to my clients, so it will take a bit of time, but couples appreciate it and it helps me to feel like I can take the time that I need to finish the full edit knowing that the couple has something in hand already.
Main Selection Edit
I shoot well over 1000 images throughout the course of a typical 8-10 hour wedding day. This means that going through a full shoot and selecting the images that should be delivered to the client takes a lot of time and focus. I typically spend an hour or two on the first selection, then on another day when I have fresh eyes, I will refine my selection even more. I make sure to only deliver the images that are up to my high standard, which means I do not include anything that is unintentionally out of focus, extremely unflattering, or otherwise lacking. Often, I will photograph 5-10 frames of the same moment and so I will spend time picking out the 1-2 shots in that series that stand out as the strongest. The images that I choose to deliver at the end of my editing process will potentially be posted, printed, or otherwise shared and will represent my brand, and so I take great care in the selection process to choose the best, most beautiful or emotionally impactful images to deliver to my clients while still giving them lots of options for photos of each part of the day.
Lightroom Edit of Selected Photos
Once I have my selection to edit, I upload them to Adobe Lightroom which is where I do broader editing on each image such as color correction, exposure adjustments, and cropping. I maintain a consistent editing style on each image so that they have a cohesive look with the rest of my work.
You’ll find that each wedding photographer has their own style - there are a few trendy styles in the wedding photography world right now including “light and airy” photography with low contrast, less vibrant colors, and blown out highlights, and “dark and moody” photography with more neutral, muted colors and a cinematic feel. Both of these have merit and can be beautiful, but I avoid trends for good reason. I want to make sure that my work will not look dated in 10-20 years. I want my client’s images to be timeless and so, although I do some tweaking to make my photos pop, I stick to true to life colors in my edits.

Photoshop Final Edit (for more advanced, detailed editing)
Many photos will require some additional work to be perfected. Since my background is in photojournalism, I tend not to like to mess with my images too much. I will not do much in the way of changing appearances or altering the scene from how it truly appeared, but, if for instance an “Exit” sign or a bright orange traffic cone is distracting from an otherwise good image, I will remove it (see before and after example below). This is the final step in my editing process. The tones, exposure and color will have already been perfected but smaller, more detailed edits will be done in Photoshop.

Final Check & Upload of Edited, High-Resolution Gallery
Before uploading my final edited images I do a once-over with fresh eyes. I’ll give the gallery a day or two without touching it and then open it up, and go through it making sure all of the photos are edited the way that I want them and in perfect shape for delivery. Once I’m feeling good about them, I will upload to Sprout Studios, the gallery host that I use, and once again check that the photos have uploaded in the correct order and are ready for delivery.

Gallery Delivery to Client
As soon as I’ve uploaded the gallery, I send my wedding couple a very exciting email - YOUR WEDDING GALLERY IS READY!
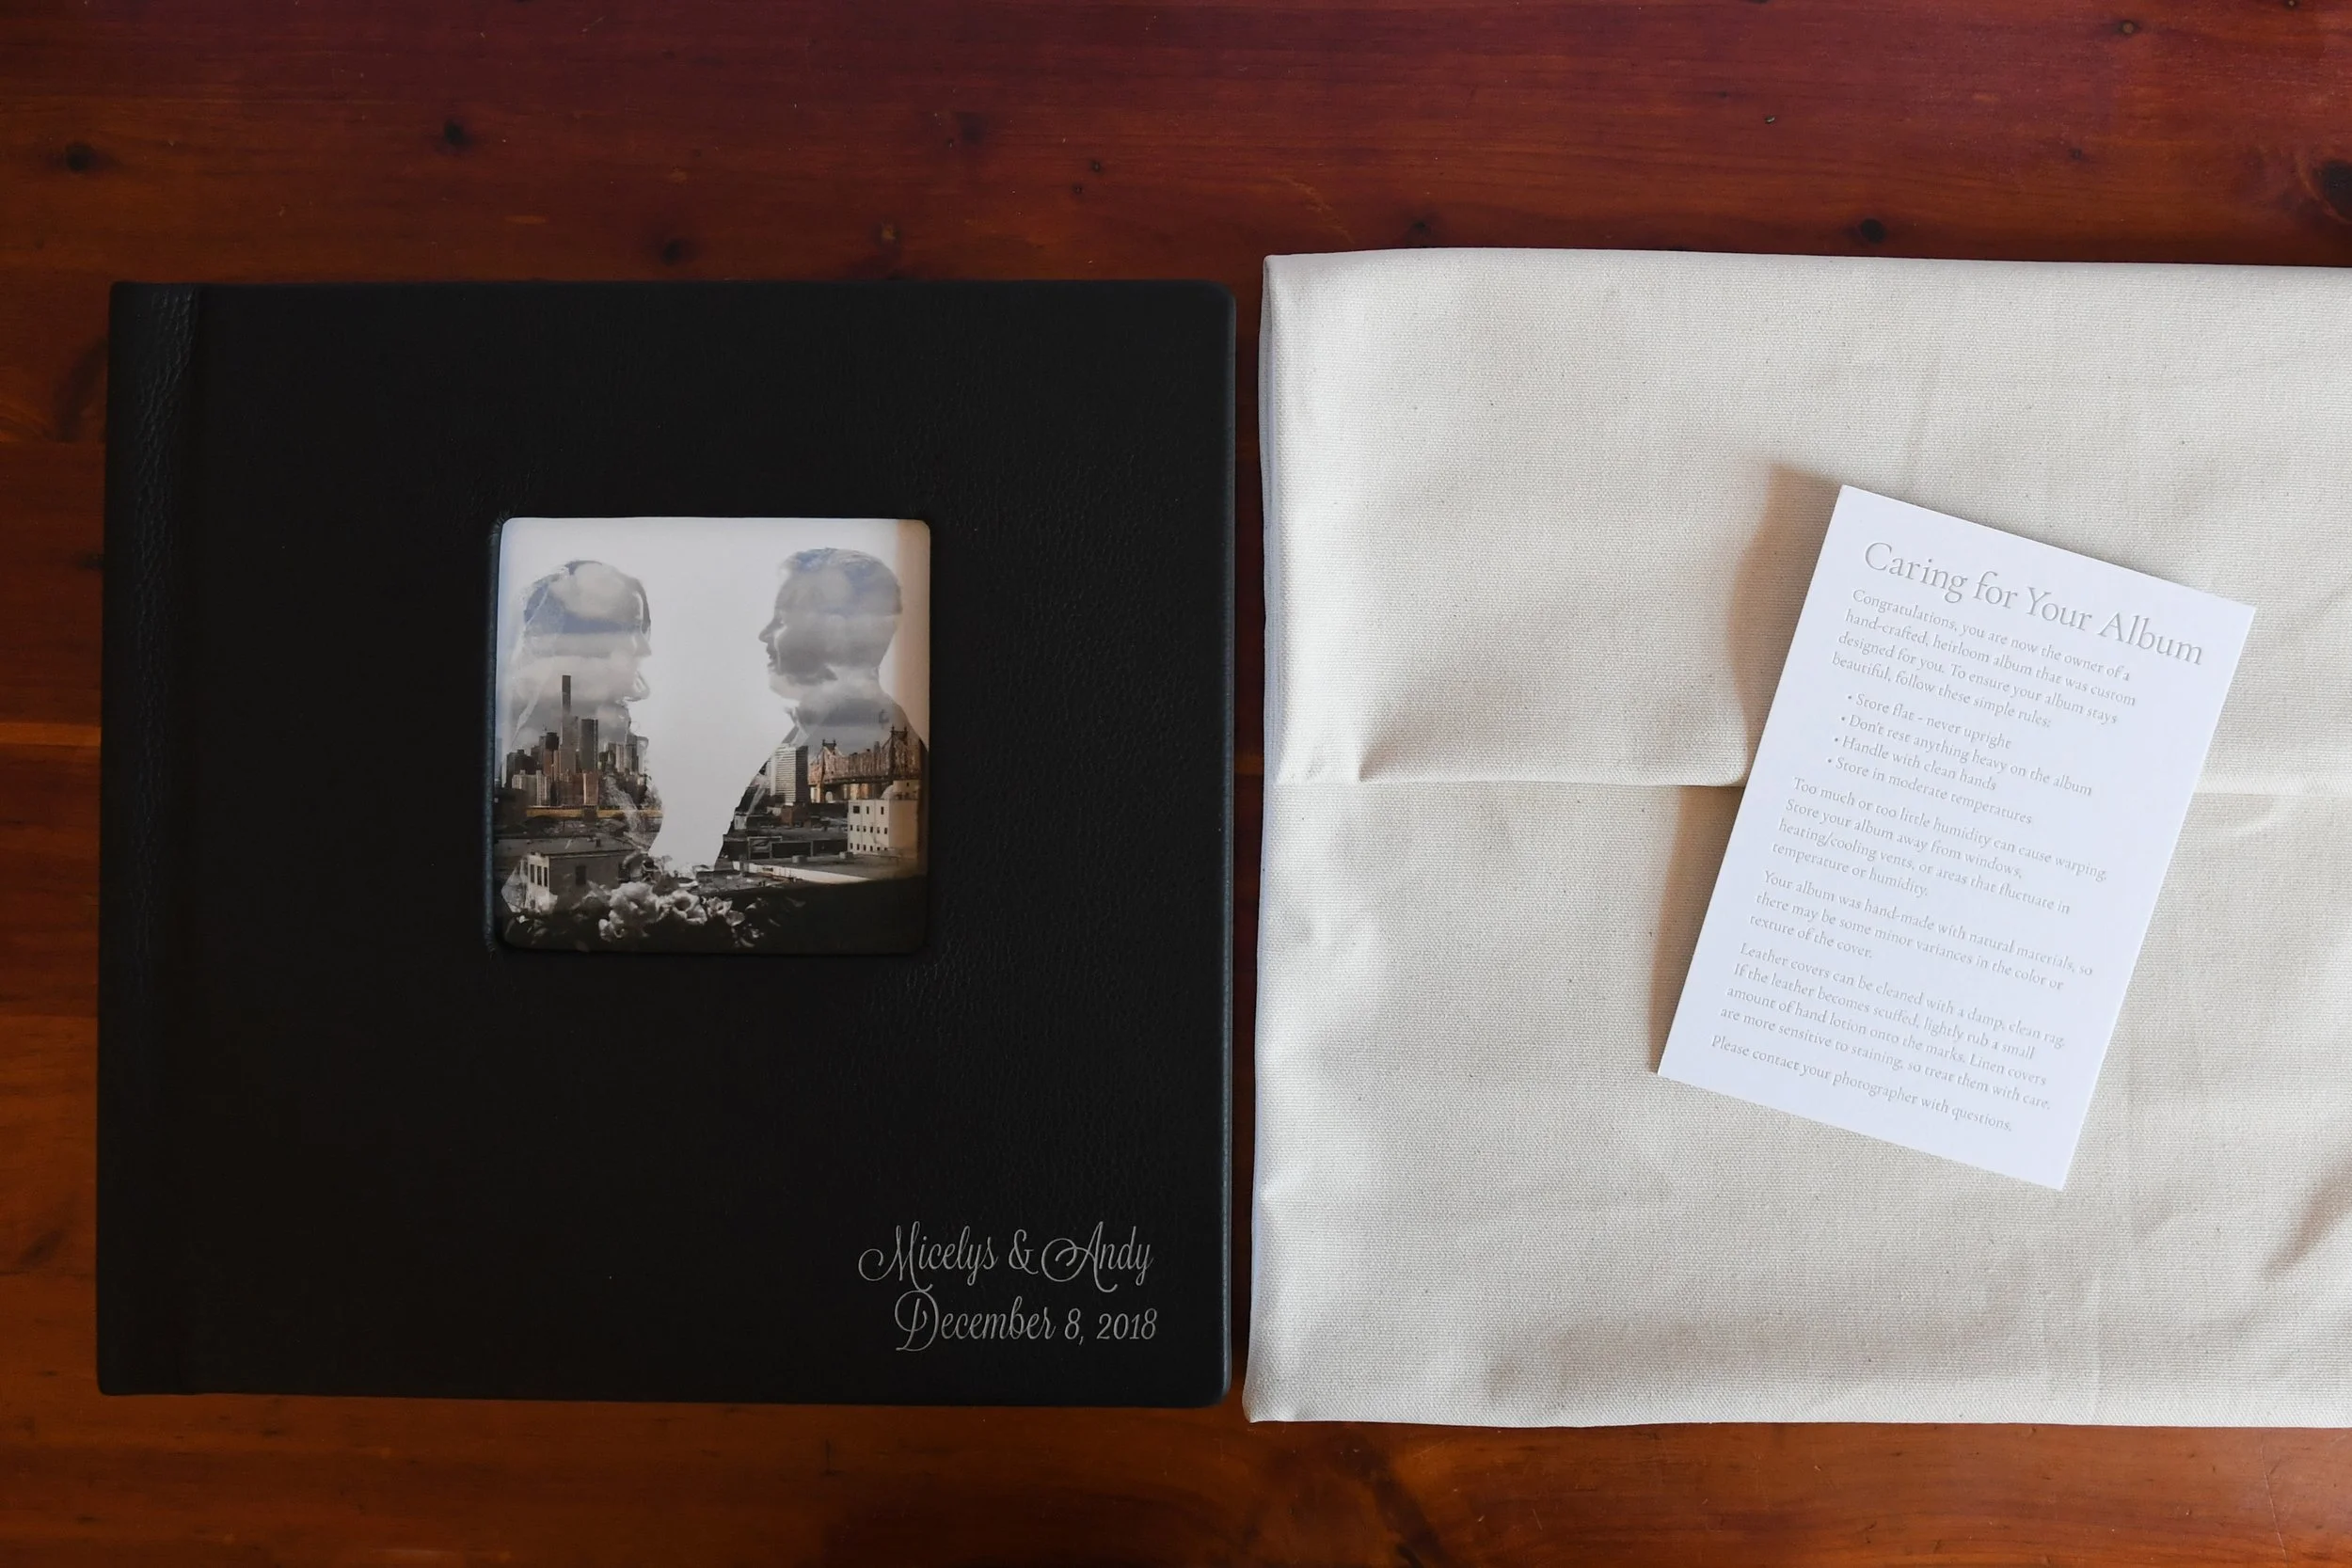
Follow Up & Album Creation
After the couple has viewed their gallery (and hopefully left me an amazing review!), they have the option to create albums with my design assistance. Most of my packages include an album, but it is always an option to add on after the wedding. I use Kiss Books for my albums because of their extremely high quality, wide range of design options and beautiful craftsmanship. They have options for both luxury heirloom albums in leather or linen as well as less expensive but just as beautifully made photo books.

And that’s a wrap (until my next wedding)!